SpringCloud-Bus消息总线
在SpringCloud-Config里我们讲到了使用外部统一的配置(案例采用GitHub)来托管我们的配置文件。但是有个小问题,如何让他们修改一处就处处生效而不用每个微服务都去手动发一个post请求或者重启服务呢,这就需要用到我们的Bus消息总线了。所以一般他们两个都搭配起来使用的。
SpringCloudBus配合SpringCloudConfig使用可以实现配置的动态刷新。
Spring Cloud Bus是用来将分布式系统的节点与轻量级消息系统链接起来的框架
它整合了Java的事件处理机制和消息中间件的功能。
Spring Clud Bus目前支持RabbitMQ和Kafka。
在看下面的内容之前我建议你对RabbitMQ有一定的了解和认识。不懂的话怎么办,欢迎查看我的另一篇博客
什么是总线
在微服务架构的系统中,通常会使用轻量级的消息代理来构建一个共用的消息主题, 并让系统中所有微服务实例都连接上来。由于该主题中产生的消
息会被所有实例监听和消费,所以称它为消息总线。在总线上的各个实例,都可以方便地广播一些需要让其他连接在该主题 上的实例都知道的消息
基本原理
ConfigClient实例都监听MQ中同一个topic(默认是springCloudBus)。当一个服务刷新数据的时候,它会把这个信息放入到Topic中,这样其它监听同一Topic的服务就能得到通知,然后去更新自身的配置。
使用Bus
安装配置RabbitMQ,建议直接使用docker一气呵成。
具体我在这里已经写过了。大家可以看看。
继3355微服务之后,我们再创一个3366,为的就是让效果显著。
这里我就不介绍3355和3366了,因为在Config博客已经详细说过。
启动7001,3344,3355,3366,测试结果为正常。
我们将对3344这个微服务进行配置,因为它是直接与GitHub相连的,所以Bus广播做到这里最合适。
关于Bug广播的设计思想有两种
- 利用消息总线触发一个客户端/bus/refresh,而刷新所有客户端的配置
- 利用消息总线触发一个服务端ConfigServer的/bus/refresh端点,而刷新所有客户端的配置
我们将推荐并长期使用第二种,为什么第一种思想不合适呢,
- 打破了微服务的职责单一性,因为微服务本身是业务模块,它本不应该承担配置刷新的职责。
- 破坏了微服务各节点的对等性。因为第一种,有一个客户端需要额外的承担刷新职责,而其他的客户端却只有业务职责有一定的局限性。例如,微服务在迁移时,它的网络地址常常会发生变化,此时如果想要做到自动刷新,那就会增加更多的修改
对3344,3355,3366添加消息总线依赖
<dependency>
    <groupId>org.springframework.cloud</groupId>
    <artifactId>spring-cloud-starter-bus-amqp</artifactId>
</dependency>
修改3344的配置文件
spring:
  rabbitmq:
    host: 192.168.111.130 #ip
    port: 5672 #默认就是5672
    username: guest
    password: guest

management:
  endpoints:
    web:
      exposure:
        include: 'bus-refresh'
3355和3366的配置文件
spring:
  rabbitmq:
    host: 192.168.111.130 #ip
    port: 5672 #默认就是5672
    username: guest
    password: guest
management:
  endpoints:
    web:
      exposure:
include: "*"检查一下3355和3366控制类,必须加上注解@RefreshScope
我将贴出3355的完整代码,3366也是一样的。
package com.xn2001.springcloud;
import org.springframework.boot.SpringApplication;
import org.springframework.boot.autoconfigure.SpringBootApplication;
import org.springframework.cloud.netflix.eureka.EnableEurekaClient;

/**
 * @author 乐心湖
 * @date 2020/5/29 14:40
 **/

@EnableEurekaClient
@SpringBootApplication
public class ConfigCenterMain3355 {
    public static void main(String[] args) {
        SpringApplication.run(ConfigCenterMain3355.class,args);
    }
}
package com.xn2001.springcloud.controller;
import org.springframework.beans.factory.annotation.Value;
import org.springframework.cloud.context.config.annotation.RefreshScope;
import org.springframework.web.bind.annotation.GetMapping;
import org.springframework.web.bind.annotation.RestController;
/**
* @author 乐心湖
* @date 2020/5/29 14:41
**/
@RestController
@RefreshScope
public class ConfigClientController {
@Value("${config.info}")
private String configInfo; //要访问的3344上的信息
@Value("${server.port}")
private String port;
@GetMapping("/configInfo") //请求地址
public String getConfigInfo() {
return "\t port:" + port + " text:" + configInfo;
}
}#bootstrap.yml
server:
port: 3355
spring:
application:
name: config-client
cloud:
#Config客户端配置
config:
label: master #分支名称
name: config #配置文件名称
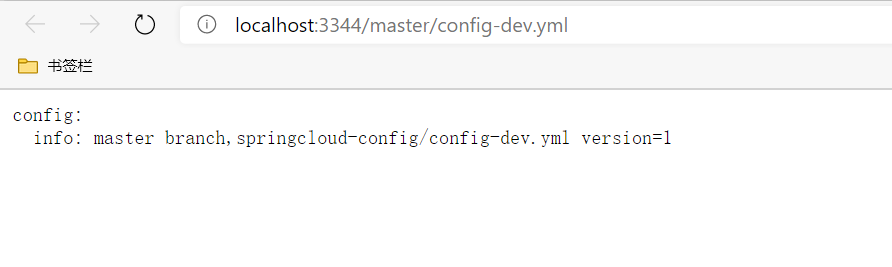
profile: dev #读取后缀名称 上述3个综合:master分支上config-dev.yml的配置文件被读取 http://config-3344.com:3344/master/config-dev.yml
uri: http://localhost:3344 #配置中心地址 表示通过这个服务端访问
rabbitmq:
port: 5672 #默认就是5672
username: guest
password: guest
host: 192.168.111.130
#暴露监控端点
management:
endpoints:
web:
exposure:
include: "*"
#服务注册到eureka地址
eureka:
client:
register-with-eureka: true
service-url:
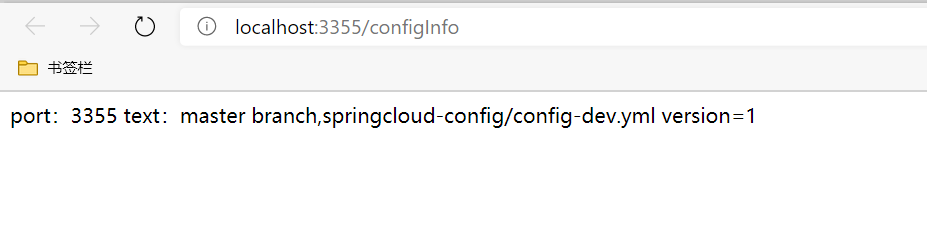
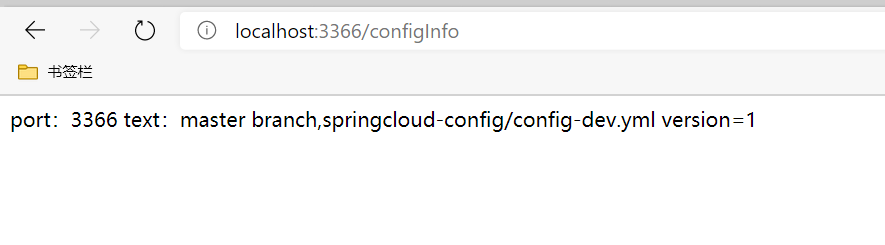
defaultZone: http://eureka7001.com:7001/eureka启动7001和3344,再启动3355和3366,测试一下访问相关接口是否都正常。然后再继续往下。
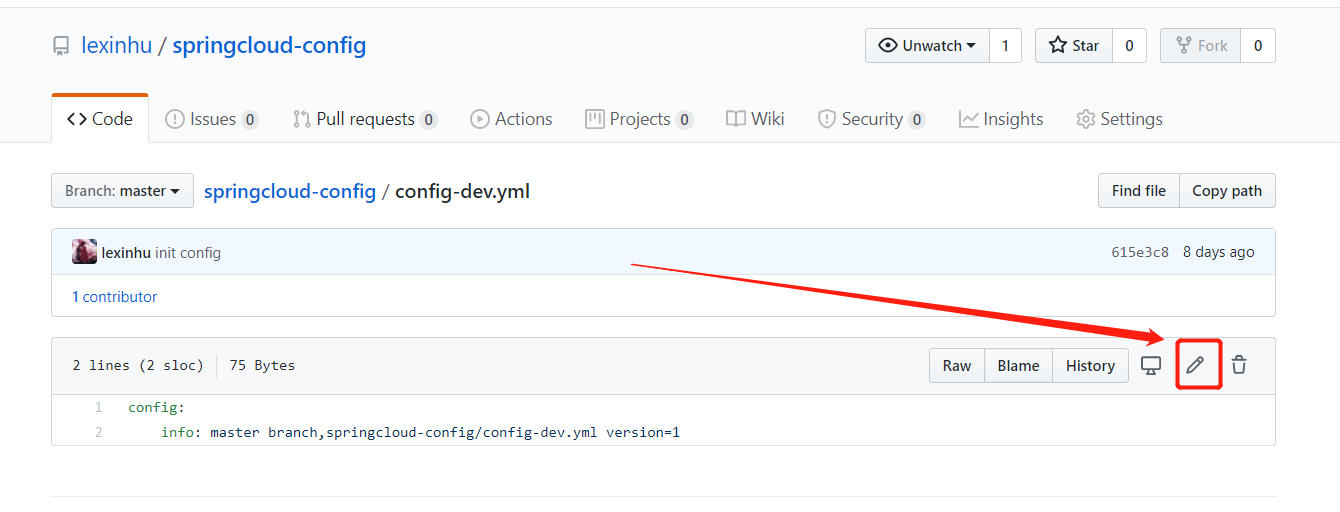
我们把GitHub上面的配置文件改一改,就把后面的version=1改成5吧,下拉到绿色按钮保存。
重新访问:http://localhost:3344/master/config-dev.yml
可以看到这边已经同步了,但是此时3355和3366还没有同步,别着急。
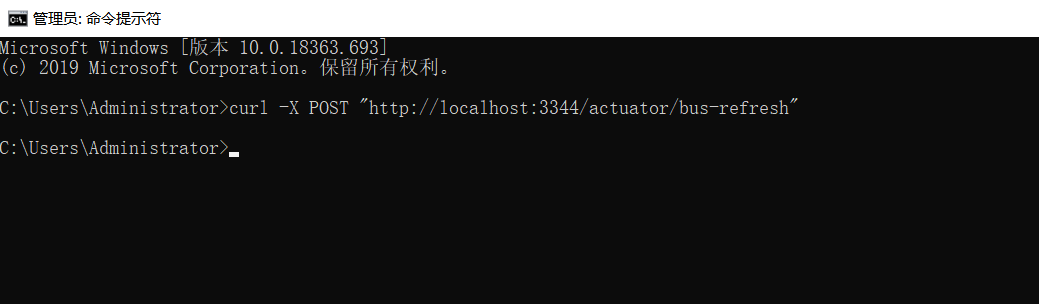
我们只需要给http://localhost:3344/actuator/bus-refresh发送一个post请求即可实现同步。
这里我直接使用cmd发送了,懒得去开postman。
命令是
curl -X POST "http://localhost:3344/actuator/bus-refresh"
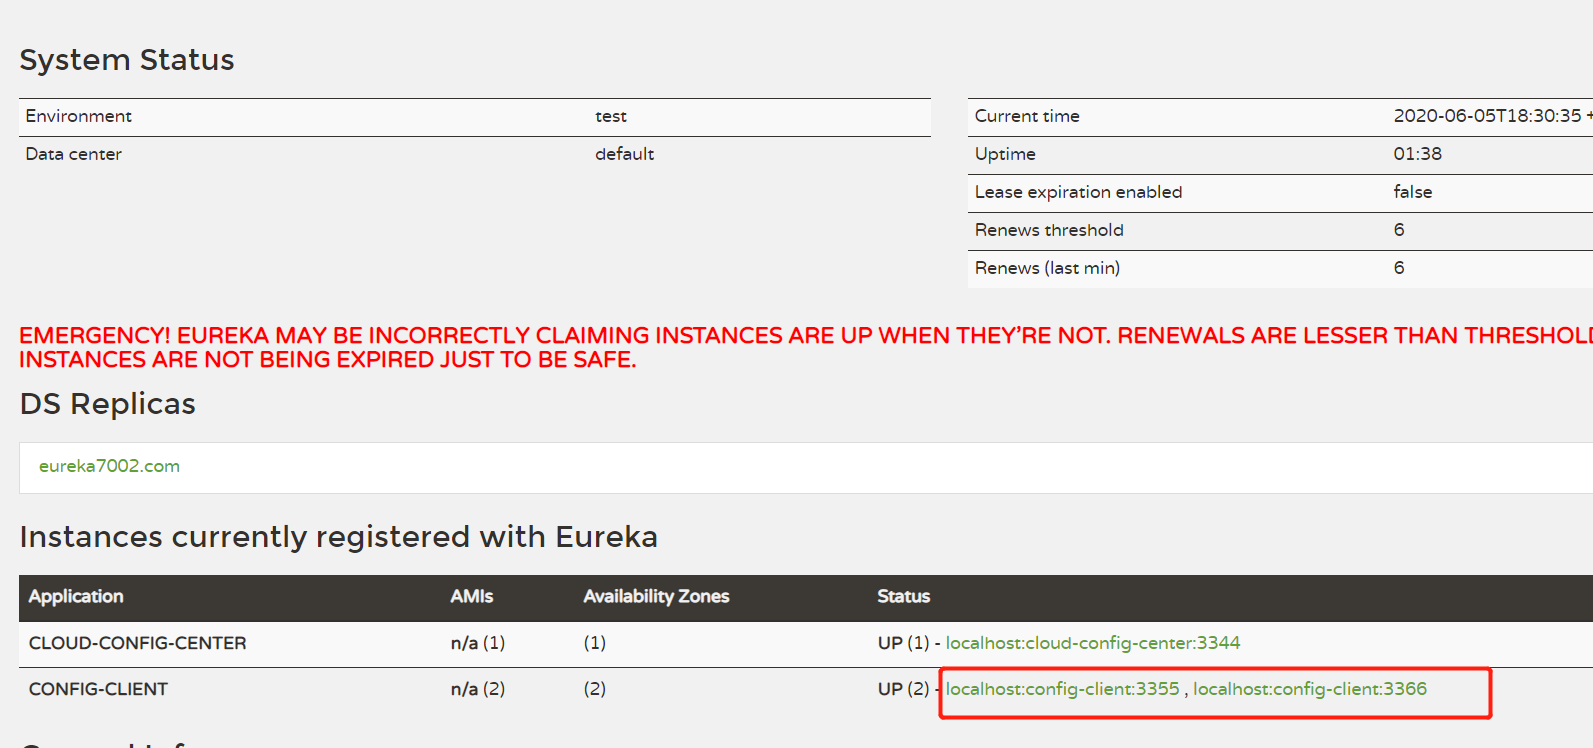
然后访问http://localhost:3366/configInfo和http://localhost:3355/configInfo
可以看到结果已经同步过来了。
上面我们是全局同步更新,下面介绍一下如何定点更新(就是只更新一个服务)
实现方法:cmd执行命令时后面带上全服务名,例如:
curl -X POST "http://localhost:3344/actuator/bus-refresh/config-client:3355"
再去GitHub修改一下version测试。
执行完命令结果可以看到3355同步更新,3366不同步更新。
版权属于:乐心湖's Blog
本文链接:https://xn2001.com/archives/495.html
声明:博客所有文章除特别声明外,均采用 CC BY-SA 4.0 协议 ,转载请注明出处!
